By Max Freeman, Geomagic Solutions
Have you ever noticed that the sound on your iPad, even at full volume, isn’t particularly loud? I’m not sure how putting the speaker on the back of the iPad passed Steve Jobs’ sanity test, but somehow it did. It works ok, but isn’t great. I use my iPad mostly to watch TV and movies, so sound is important to me. Of course you could wear headphones or follow my habitual routine of cupping your hand over the speaker to bounce the sound forward. That works remarkably well, but this is 2014! Such manual maneuvering should be a thing of the past.
This has been irritating me for a while, and while traveling this week I found myself with about an hour between meetings. Surrounded by 3D printers at the 3D Systems Geomagic office in North Carolina, I decided to challenge myself to design and print a solution in under an hour.
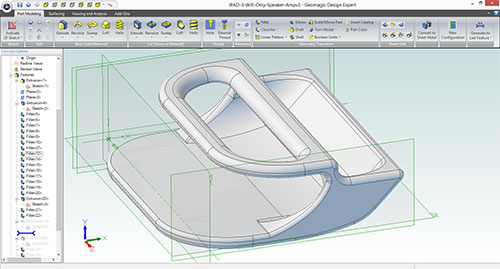
(Image above: The CAD model in Geomagic Design)
Apple posts measurements to its website for its devices so peripheral manufacturers can make stuff that fits; with access to a 3D printer it turns out that’s exactly what I am. I turned to Geomagic Design, our core CAD software. Armed with measurements from Apple, I cranked out the first prototype of a small attachment that fits over the speaker area and redirects the sound forward. It took about 25 minutes to complete the design, and then I saved it out to STL, ran it through the Cube software and went over to start a print.
Forty-five minutes later my first design prototype was complete and I put it to the test. Sure enough, the audio was much louder. Epic win. My theory was correct. But the way I had designed it meant that it would slip off too easily if you moved or tipped up the iPad. On to prototype number two.
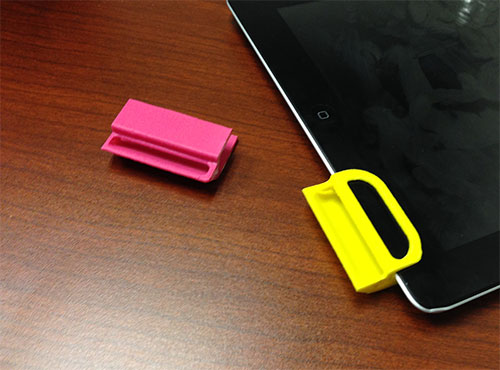
(Image above: the first two prototypes, the pink one is the first design which needed a better fit, the yellow one is the second as described below.)
The next day I had a little down time again, so I opened up the design and made it fit more snugly with a simple edit. At this point the functionality was proved-out, so it was time to make it look like it belonged alongside an Apple device. Within about 20 minutes it was simple to add some curves and remove some unneeded material so it would print faster and look sleeker. 45 minutes later I had prototype two. It fit well, looked better, and performed terribly at its job as a sound-bouncer! In my zeal to remove material, I accidently removed a key area that bounced the sound forward.
Going for lucky number three, I replaced the material in the back of the design, tightened the dimensions just a little more and set it going in a Cube printer. Forty-five minutes later—success. A perfect device to fix my iPad audio, and even better, I got this one done in black.
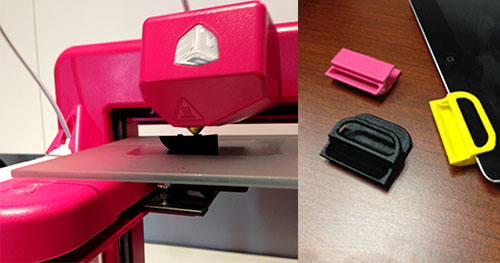
(Image above: Printing the third prototype on a Cube 3D printer and the three prototypes together.)
Not bad for a smidge over 1 hour of design time and just over 2 hours of 3D printing.